Before and After #59
Sunday, 10 August 2025
Another St Helens before and after. This one started with my mistake in ordering probably 5 x the amount of mulch we needed to re-mulch our garden area. I didn't get a good photo, but this resulted in a mulch mountain sitting on the front lawn, slowly killing off the grass underneath it. .jpg)
So we decided it was time to extend the garden beds. We had a few rocks and grasses sitting out on the lawn slightly weirdly anyway - so putting a bed around it would finally make them look better, and use up some of the mulch. Unfortunately this meant we needed some more garden edging, which I had to go to Launceston to get, but since I was running out of some art supplies I was happy to spend half of Friday driving up to the big-smoke and getting supplies - including a little cart which would help us relocate our five zillion tonnes of mulch. This was worth the trip in itself (we had already looked locally but the options were too big and expensive at the local mitre 10). So now we have a new bed, some new plants and rocks that don't look quite as much like they fell from the sky: .jpg)
We still had 2/3 of the extra mulch so that has now been relocated to the side of the house - I think we probably had enough to cover the entire front lawn! I won't make that mistake again.
|
Before and After #58
Sunday, 16 March 2025
Our first visit back to St Helens after a busy summer of guests revealed a bit of a to do list, starting with the garden.. .jpg)
No matter, it didn't take long to weed and get it back into shape: .jpg)
Looking at the garden in this angle really reminds me of what was a large inspiration for the curved path and grasses - from one of our favourite spots nearby.. .jpg)
The beautiful pathway leads to one of our favourite beaches: %20(Small).jpg)
|
Before and After #57
Sunday, 16 March 2025
I have my mosaic stuff out for the first time in many years as I'm working on another project that's been waiting for me for about a decade. With all my equpment at my fingertips it was hard to ignore the fact that my mosaic blackboard by the front door was looking pretty ratty. I've already restored it but that was probably more than 5 years ago, definitely time for more TLC .jpg)
Once I took it off the wall it took about 2 weeks of small daily efforts to re-tile, repaint and then, in an effort to discourage tiles from dropping off the bottom every time it got bumped, frame. I'm happy with the final result. :%20(Phone).jpg) %20(Phone).jpg)
|
Ballarat Marathon - Before and After #
Sunday, 12 May 2024
A few weeks ago Jon and I travelled to Victoria to participate in the Ballarat Marathon. We'd both been training hard for months - Jon had been running while I'd been focusing on positive yelling and bell ringing. I should have done more training with taking photos AND bell ringing at the same time as it turns out I needed that skill too. .jpg)
Anyway - we were lucky enough to have time to fly over on Friday so we could have a relaxed Saturday checking out the course and the various vantage points: .jpg) We also spent time hanging around our cute little airbnb - which was so quirkily styled it was starting to look like an escape room: .jpg) .jpg)
.jpg) .jpg)
The weather for the weekend was really calm and not too cold which was nice. On race day I dropped the 'before' version of Jon off near the start line: .jpg)
then I rushed home to gather my stuff and take my position at the first place I'd said I'd definitely be at. Unfortunately because I had to park so far away due to street closures, I totally missed that first spot and had to find somewhere else to catch sight of him -around 7km into the race where he was looking good and running comfortably at the back of the 3hr pace group. This is where first I discovered my inability to ring the bell AND take a photo. After that first spot I rushed over to another vantage point, then another, then another. Sometimes I even had to jog to make it in time - although on the second loop I seemed to have a bit more time to spare and instead of Jon being within reach of the 3hr pace group, they were my warning that I had 5 or so minutes to go. I did manage a few dodgy photos as we went: .jpg) I I
I wouldn't say the streets were lined with spectators (see above), but there were a few larger groups at some of the turn around points. I particularly loved this sign: .jpg)
Eventually after 20000 of my steps, and 40000 of Jon's, he crossed the line in 3hrs 13 minutes. We're very proud of him. .jpg)
And he was still in good enough spirits to pose for an after photo: .jpg)
Thankfully we'd organised a late checkout, so we were able to return there so he could have a shower and some food before we left for the airport. All of this was a few weeks ago and since then Jon has recovered enough to start looking for a new marathon course to do. I'll have bell ringing AND photo taking down pat by then I'm sure.
|
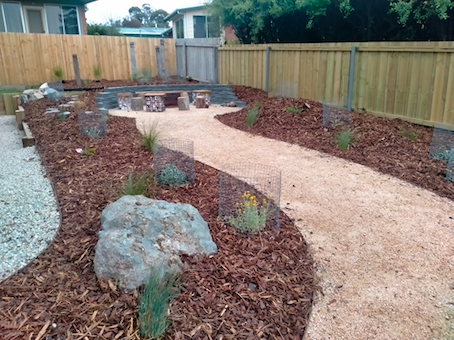
Before & After #56 - more garden
Sunday, 22 October 2023
One of the many joys of the big north facing windows of the St Helens house is the view over the garden that we've been working on since the house was finished. We've gone from this: .jpg)
To this: .jpg)
It's lovely. And it's not just the outcome, it's also the knowledge that this is the result of our hard work as well as the forced labour of many (most) of our friends and family - from planting to digging to watering to shovelling loads and loads of topsoil and mulch around. We're having a constant battle with the the wallabies and the occasional deer - every time I decide a plant is mature enough to un-cage (they seem to mostly focus their attention on the supple new plants), they decide it's still delicious and nibble it down to the ground - they owe us $100s in nursery costs. The grasses seem to mostly have survived although there are a few they simply won't leave alone which is weird as to the naked eye they look exactly the same as the one beside it which is untouched.
|
Before & After #55 - the driveway
Saturday, 26 August 2023
When we made plans for the first phase of landscaping for St Helens, we agreed that we would have a gravel driveway as it would be a) cheaper, and b) possibly nicer than a whole lot of concrete. And from a distance it seems fine: .jpg)
But actually it's been a major pain. Firstly, whenever there is heavy rain, lots of the gravel just washes down into the street, leaving ankle-rolling ditches and holes: .jpg)
Secondly, it's a bit yukky to walk on in bare feet as the gravel sticks to your feet or any bags you put on the ground - pretty early on we re-used Jo's pavers to create a way to hop from the door to the bins without touching the gravel - it just required a leap off the doorstep to start with. .jpg)
But the worst part is that every time someone walks across the driveway and into the house they either have to spend a minute getting the gravel off their shoes, or we immediately get gravel footprints and little pieces of gravel everywhere inside the house. It's been really annoying and messy and I've spent way too long vacuuming the entrance area and sweeping out the garage. We also need to sweep and mop the doorstep regularly to keep it from looking awful. About a month ago we agreed the annoyance outweighed the hefty cost of getting the driveway concreted so we organised a local crew to come and fix it for us - it was my job to supervise the work (well, be around for questions) this week which is why I've stayed on in St Helens. Before Jon left we went outside and marked out the approximate position of the new work - as you can see we had differing opinions about the coverage in some areas! .jpg)
The job itself took two days and a revolving crew of about 6 blokes. A bonus of the work was getting the drain in the driveway replaced as it's been a bit of a hazard since it was installed. .jpg)
.jpg)
By Tuesday afternoon the concrete was poured and by Thursday I could walk on it and start on the cleanup process - there was a lot of concrete in the garden and splashed onto the side of the house and posts. I spent a lot of time with a scrubbing brush and scraper cleaning up edges and wiping surfaces. .jpg)
Now it's nearly dry and looking great - it's been such a pleasure to walk in and out of the house without leaving a trail of gravel! There's still some dirt and gravel the contractors need to come and clean up but aside from that it's looking schmick. .jpg)
.jpg)
and as another bonus, I've been able to re-re-use Jo's pavers out the back! .jpg)
|
Before & After #54: Window Sills
Saturday, 6 May 2023
Painting the window sills at St Canice Avenue is fiddly and time consuming, and I'm constantly shocked at how bad their current condition is, but the end results are worthwhile: 
before: 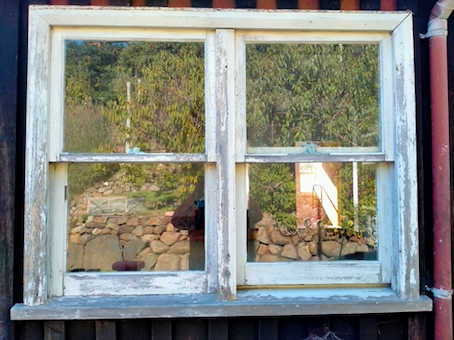
after: 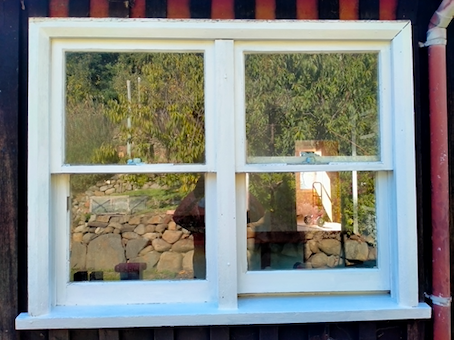
|
Before & After #53: Woodbox
Tuesday, 7 March 2023
The fire pit at St Helens is looking a lot nicer now that we've done all the landscaping - consequently it's getting a bit more use from guests. We don't guarantee that there will be wood for it (they have instructions to buy it from the service station) but it is nice to provide it when we can. Up until now we've just been using an old ikea bag for the sticks, but with a few different guests staying before we are back to refill it, we needed a better and dryer way of storing it. I investigated buying something but that would have cost a few hundred bucks so then I investigated what we had lying around the house, and it turned out we had something perfect - our storage seat that we never sit on: 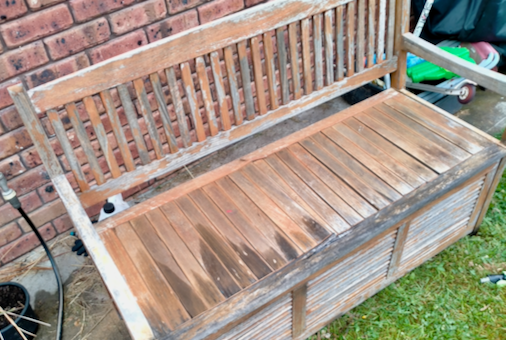
I had to do a few structural repairs and saw off the arms and back, then I coated it with waterproof bitumen paint.. 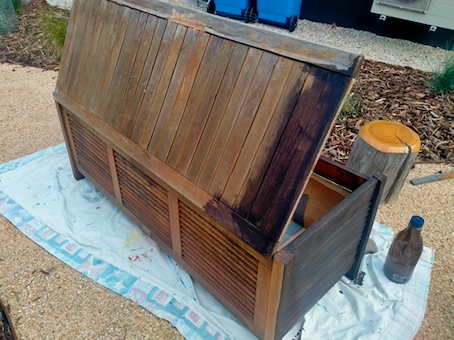
I attached a handle to encourage people to lift the lid (and not think it was just a seat) and now it looks pretty good: 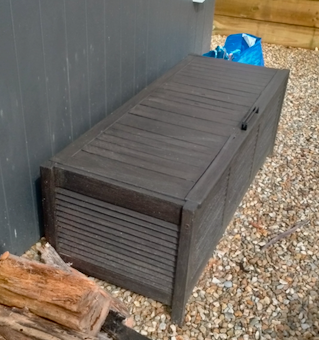 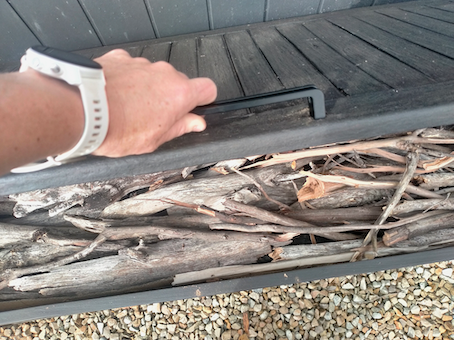
It should keep everyone going until we're back.
|
Before & After #52 : Pizze thingies
Thursday, 2 March 2023
The last time I was in St Helens I accidentally melted the bejesus out of the pizza lifter things by leaving them on top of the pizza stone while I heated it up: 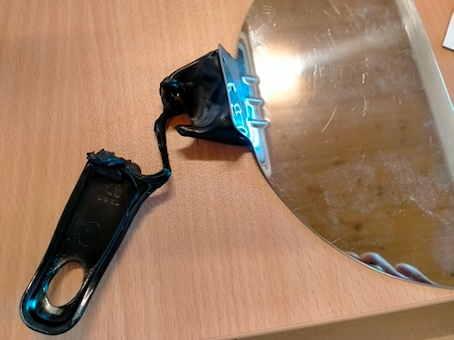
So I needed to make some new handles. I turned to our dead stump next to the driveway to find some replacements: 
And voila: 
|
St Helens Garden Projects
Saturday, 14 January 2023
With just us four left here on Friday, being in this house felt so normal it was very much like being at home - at least for me anyway. The kids don't quite feel the same way as they chop and change beds and bedrooms depending on availability. I've been here 12 days now - it's still great. Today I took some photos of the garden before heading out for a run: 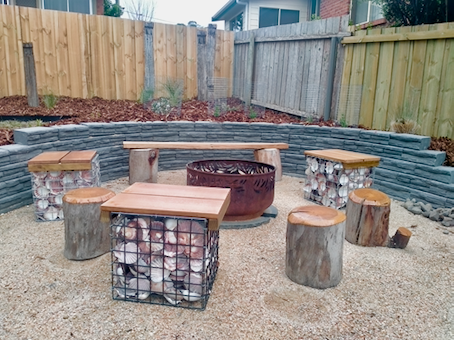
Quite the change from this a week ago: 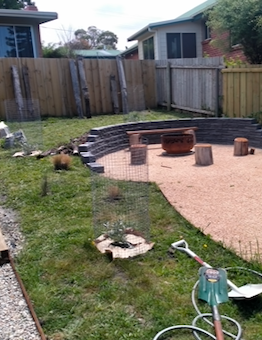 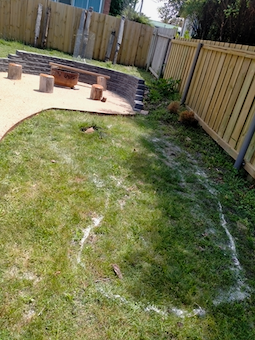
After hauling mulch all around the garden Jon has his heart set on completing some other projects around the back of the house while we are here. He's going to be busy: 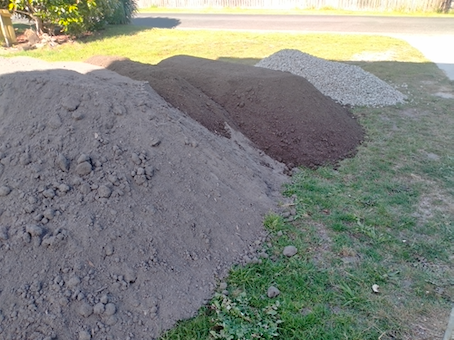
|
Before & After #51 : Footstool
Saturday, 9 July 2022
I am no upholstery expert but I figured in this case I couldn't do worse than the state of the Denny's foot stool before I started.. 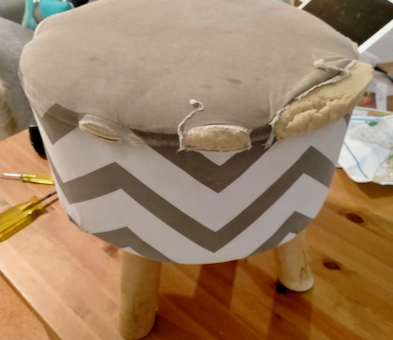
Yep it's not perfect. But it's better: 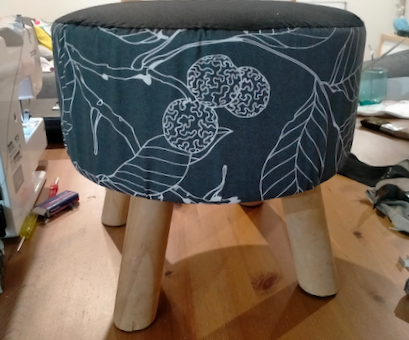
|
The Kauri Wood
Tuesday, 14 June 2022
When we tidied up dad's shed a few months ago we came across a lot of wood. Most of it was scrap, but there was also a pile of long planks taking up a fair bit of floor space - in fact they made it impossible to access many of the shelves without awkwardly squeezing your feet alongside them. Those six thick and 3 metre long planks had been there for at least 20 years - Dad had shipped them down from Sydney when he went to clear out his mum's place many years ago. Mum had previously learnt that these were kauri wood planks, reclaimed by my Sydney grandfather who worked for the Tooth's brewery in Sydney. He re-routed the wood from a certain tip ending when the brewery's wooden hop vats were replaced with stainless steel ones (which he helped design) a zillion years ago. It seemed weird to me that the brewery would use such expensive and rare wood in the first place, but in all likelyhood, when the company bought the wood in a job lot a hundred years or so earlier, it probably wasn't valued very highly. A few months ago I got Zali to help me lift one of those dusty, dirty and insanely heavy planks onto the roof racks of the car and we drove it home. Later that day, after I hauled it singlehandedly off the car, nearly killingmyself in the process I noticed it had a lot of termite damage on the underside. Looking closer still I realised the holes running widthwise through the plank would make it next to impossible to use for anything. So with much annoyance I dragged the plank around to the side of the house and left it there - thoroughly regretting moving it in the first place (as now I was going to have to get rid of it). I went about my business for another month or so (trying to avoid eye contact with the plank lurking next to the wheelie bins) before I suddenly felt inspired to give it another chance. I pulled out my electric planer and ran it over the top.. 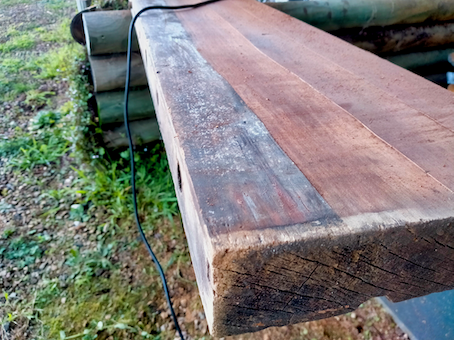
Huh, I thought to myself. This might actually be ok. So I continued planing and sanding and filling the gaps and holes, and leaving other imperfections (for character of course), and staining and sanding then staining again.. 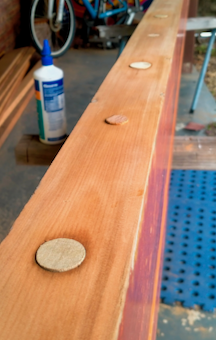 .png)
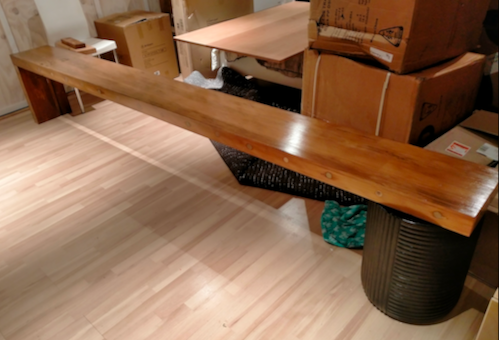
Until I eventually decided I actually needed another plank to finish my projects so I took Jett with me and we collected another one. This one was in even worse condition than the first but now I had a solid plan and technique so it didn't matter. In the end I made a long entertainment 'plank' for the new shack, and 3 bench seats. The wood is lovely and heavy and has weird holes and termite marks and a long history and I love it. 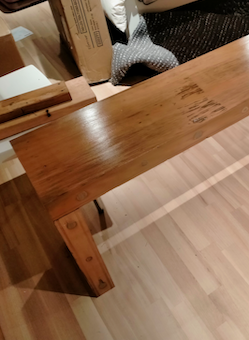 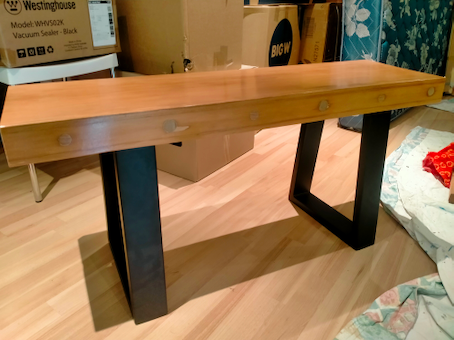
|
Before & After #50 : Jett
Monday, 20 December 2021
Speaking of weeds, last Thursday was Jett's last day of high school, and also the last day of wearing a school uniform. If you can call it a school uniform. It was held together with safety pins all through his final term. 
He wore his school uniform better back in his Collegiate and Sandy Bay Infant School days..  
|
Before & After #49 : Rug Replacement
Monday, 8 February 2021
After 15 years and 15 tonnes of dust, dirt and food scraps deposited into it, it was finally time to replace the red rug.. 
for a less shaggy and hopefully easier to clean version. It's a bit more boring colour wise, but it does allow the artwork on the wall to shine even more. 
It's nice and soft NZ wool. 
|
Before & After #47 : Deck Projects - Part 2
Saturday, 25 April 2020
Last summer I spent a lot of time cleaning and restaining our deck and generally making it look a lot better. I think you'll agree that it looks quite nice now: 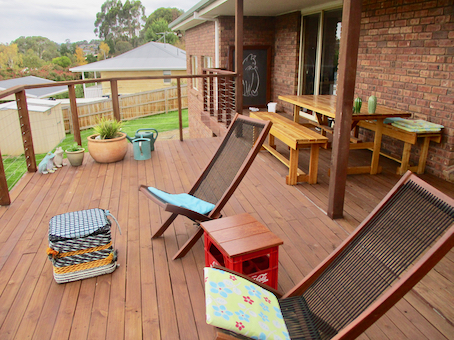
But one thing that has always let it down is the view of my work area from the relaxing area of deck. It normally looks much worse than this: 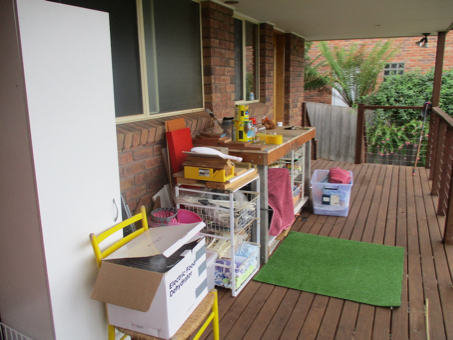
So I've been thinking about making some sort of screen for quite a while. So over easter I joined the queues of people definitely only making essential purchases at Bunnings and got the supplies I needed. Then I built this: 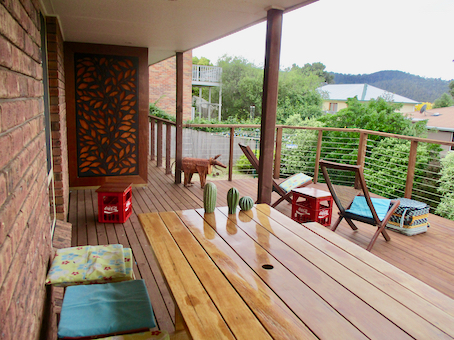
It looks a bit like it's floating there, but it's actually on wheels and in a track that's attached to the ceiling, so if we ever need to move big things across the deck, it can be rolled back a bit: 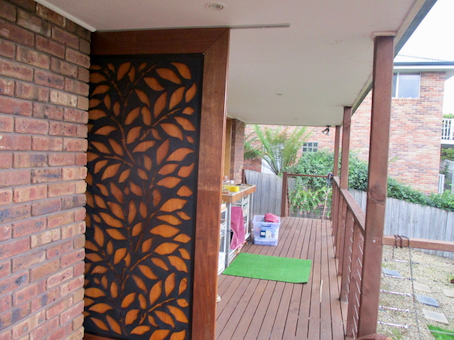
The back side of it looks a bit plain, I'll probably paint that at some stage, but for now I'm happy with the result.
|